Showing posts with label girls. Show all posts

Friday, March 11, 2016

Family Affair

Hello there,

In December, I talked with a lovely lady who wanted me to make a skirt for her and matching skirts for her little princesses. She said there was no hurry so we took some time going back and forth online until she found the fabric she wanted. In January, when I went to get the measurements, it turned into the skirts plus vests and bow-ties for her king and prince and a pair of shorts for the prince.
I'm really grateful for the opportunity.

Enjoy the pictures below.
** I pressed the clothes before delivery; please excuse the creases below. **

All Together

King - Vest & Bow Tie


Queen - Gathered Skirt


Prince - Vest, Bow-Tie and Shorts


Princesses - 2-Tier Circle Skirts with Netting


Father & Son Set


Some Smooth Jazz


Wednesday, November 11, 2015

Salute To The Veterans

Hi there!!!

Today (11/11/2015) is Veterans' Day in the USA. It's a day to remember the sacrifice of the brave men and women who defend the freedom of their country. In thinking about this today, I dwelt on the reasons why the veterans choose to stand in the line of fire everyday: security, freedom, peace and a hope for a better tomorrow.
That's where the children come in: they are our hope for tomorrow. The veterans do what they can to ensure that the little ones have a chance to make tomorrow even better than today.

That's why the pictures in today's post are of the children's outfits that ZCD has made in recent history.
We're celebrating the sparks of hope that we have for tomorrow.


Dress and Hair Accessory


Matching Skirt and Vest for Siblings


Matching Shirt and Skirts for Siblings


Hi-Low Skirt and Blouse


Baby Dresses 


Skirt


Wednesday, September 23, 2015

Dress A Girl Around The World

* Hi there.
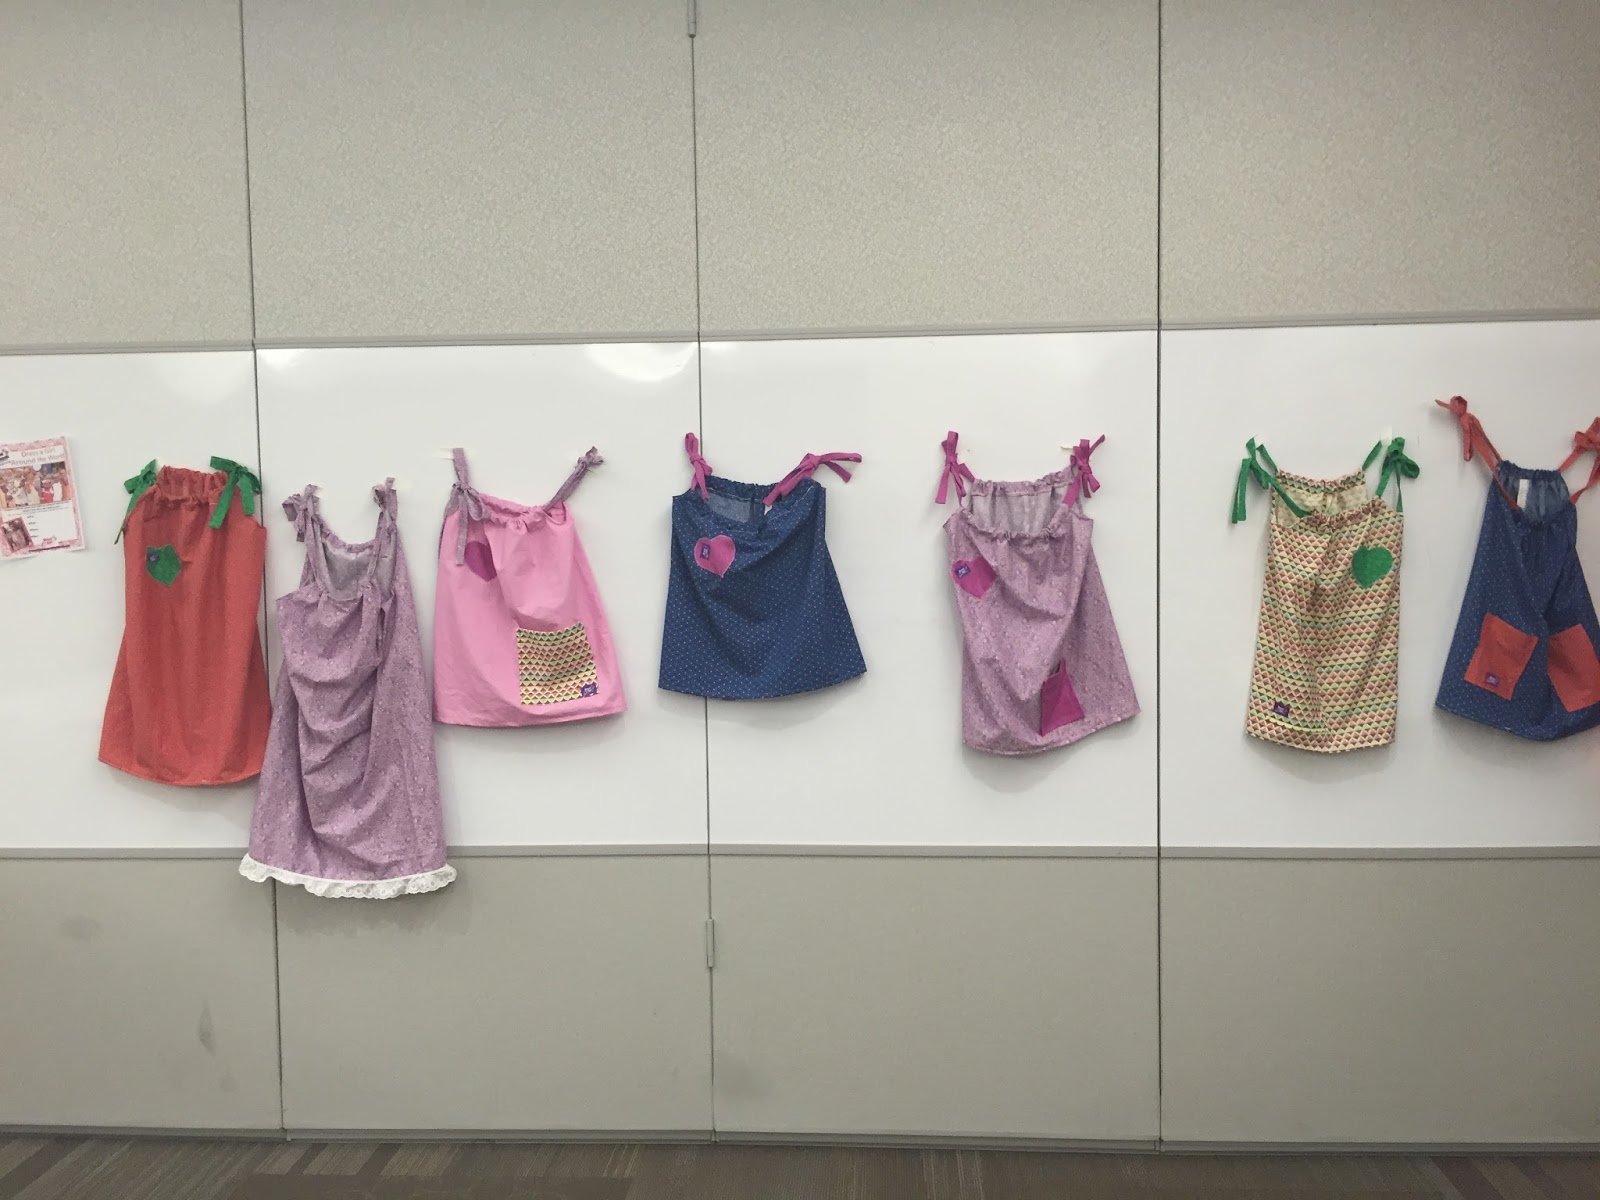
So yesterday, at my other job (my 9-to-5), 23 co-workers and 1 converted 2 conference rooms into a sewing hub and made 15+ dresses for the Dress A Girl Around The World initiative (DAGATW). 15+ because we finished 15 dresses and had bits of 4 more in progress ... to be finished on Day 2 of our effort.

I'll tell you how this came to be ...

Every year, my employer (PJM Interconnection, LLC), holds a United Way campaign for a couple of months. This starts off with a kick-off event where we can meet various charity and volunteer organizations. We then can donate to the organization of our choice online. PJM also gives us all a paid day to go and volunteer in our communities (awesome, right?). 

This year, I emailed the coordinators and said that I like sewing and would be interested in any volunteer opportunities like DAGATW that come up. We didn't have any but they were in support of the idea and said we would start one. One of the coordinators, 2 other ladies and myself created a committee to plan the event, do a test run (we made 0.8 of a dress in 3 hours because we were figuring things out as we went along) and guide and support on the d-day. The plan was to start with a half-day event on campus, see how the response is and then decide if we want to do a second one. 

Well, the turn out and support was incredible and we're having the second one on 10/16.
Yep, I love my job.

Moments that made me smile:
  • Hearing a man talking about soldering something over the weekend while he hand-stitched a label to a dress.
  • Seeing one of our Senior Vice Presidents take charge of one of the ironing boards and prep strap after strap after strap then join the hand-stitching crew.
  • The applause when a lady held up a dress and said we just completed our first dress.
  • Our MVP was a man and his sewing machine. We just let him work and kept feeding him pinned dresses, pockets, hearts and the like to sew.
  • Seeing all our dresses taped up as they were completed.
If you want to do something similar or learn more about DAGATW, click here.
You won't regret it.


Wednesday, February 25, 2015

Baby Blue Sunshine: Hi-Lo Lace Top and Skirt

* For this week, I want to showcase Zi's latest creation: this lace top and skirt set made for a special little lady. Zi has become the go-to gal for lace hi-low skirts; remember the white one in this post? She has also made one in pink and this one in blue. The blue set is a good-bye gift as the little princess and her queen were moving to Texas ... we'll miss them.
* Check us out on Instgram: @zichie_designs and @e_fazion

Enjoy the pictures below.


Wednesday, December 3, 2014

Making the Peppermint Swirls Skirt

* I have never written a sewing tutorial so this isn't exactly going to be one. What I have below are high-level instructions for making this skirt and should be scalable for girls and women sizes. It took me a while to find information on making this skirt so I am hoping that this helps someone else :). At the end of the post, I have links to where you can buy the pattern for girls and another page with a tutorial for another way to make this skirt.
** The numbers below are examples only, all measurements are in inches and no sewing allowance was included in the calculations.
*** Check us out on Instagram @zichie_designs


Step 1- Measurements Needed
Waist (W) = 22
Hip (H) = 24
Skirt Length (L) = 15
# of Panels = 8
Pattern Width (PW) = H/# of panels = 24/8 = 3
* For calculating the pattern width, use the greater of W and H.
Pattern Circumference (PC) = 2*L = 2*15 = 30
* This results in a skirt approximately L long (in my experience). This length can be shortened during the hemming stage.
Pattern Radius (PR) = PC/(2*pi) = 30/(2*3.142) = 4.77 (approx. 4 6/8 inches)

Step 2 - Making the Pattern
Draw a circle with radius = PR. This is your inner circle.
* I used gift tissue paper for the pattern and the circumference of my microwave food cover to determine my length so I could use it to draw my inner circle ...


Draw another circle with the same center as the first one and a radius = PR + PW. This is your outer circle and should be bigger than the first. 
Pick a starting point on the inner circle and about two-thirds of the way around, begin to tapper the outer circle to meet the inner circle.


Cut out your pattern.


Step 3 - Cutting the Fabric
Pin your pattern to your fabric and cut as many pieces as the required number of panels. You can try cutting multiple pieces at one time but I would caution that you don't go above 3 at a time if cutting by hand because the more pieces you have, the bigger the bottom pieces come out.


Step 4 - Putting it all Together
Serging is optional but is a cleaner look and helps with preventing stretching of the curved edges.
Arrange your pieces in the order you want them to go and sew up the curved edges; inner edge to outer edge and right sides together. Align your outer edge piece a quarter inch above the inner edge so that the waistline is smooth in the end.


Step 5 - Finishing
This green and white skirt was my first try and I haven't quite decided how to finish it. I could add an elastic waistband (enclosed or not) or a regular waistband with a zipper.
I think I'll try the zipper; let's see if I can install a curved zipper :).
And of course, don't forget to iron and hem your skirt (I hadn't at the time pictures were taken).


Other Resources
Twirling Skirt Tutorial by Ursula
Pattern for Girls 6m to 10y by Candy Castle