Showing posts with label tutorial womenswear. Show all posts

Friday, July 31, 2015

2 Days to ACANA Festival

* It's been a year of showcases so far and I thank God for all these open doors.
For my church (Love Assembly), this year is our year of Open Doors and God has been faithful to His promise.

So far we've had:
  • Fashion Show at Widener University (post)
  • Showcase at 'YAPPIES Showing Thier Creative Side' event on (post)
  • Vendor table at SAANE Networking Event on (post)
    and coming soon ...
  • Vendor tent at ACANA Festival on Sunday, August 2nd.
    ACANA = African Cultural Alliance of North America

For this event, my plan is to have one-size-fits-all items as well as skirts with elastic waists (one-size fits-most?).

** Below are pictures of some things I either or have in store or plan to make more of.
     2 days to go ... wow, almost here.

*** Check us out on Instagram @zichie_designs.


Skirts 

(Elastic Waists = One-Size-Could-Fit-Most ...)


Bow Ties


Neck Ties (... maybe)


Jewelry - Button & Charm Earrings


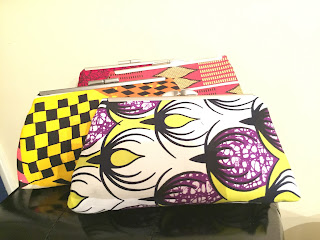
Purses


T-Shirts


Belts


Wednesday, February 11, 2015

New Top Design - Not Sure What To Call It

* In November of 2014, I was Christmas gift shopping when I saw a picture of a doll in a dress that inspired this design. The dress was fit and flare and the bottom was 2-tiers: one floral and one solid pink. It got me thinking ... what if the bodice and first tier were a blouse that could be paired with any bottoms from skirts to shorts to pants to leggings? And while I'm thinking about it, how about a hi-low hemline?

** On Thanksgiving Day, I got Zi's measurements and brought my vision to life in kente print fabric. It worked!!! I was invited to a company's end-of-year dinner party and I made another version of the top in a lovely gold and black brocade that made me think of flames and paired it with the very first high-waist skirt I made. My version of a LBD dress :).
Enjoy the pictures below.

*** Check us out on Instagram: @zichie_designs

The Top in Black & Gold Flames paired with a Pencil Skirt

 +


 I like how the opening in the front resembles a flame too.

Added black tights, black sandals, gold hair flower and black & gold earrings to complete the night's look.


The Top in Kente Print Fabric


Wednesday, December 3, 2014

Making the Peppermint Swirls Skirt

* I have never written a sewing tutorial so this isn't exactly going to be one. What I have below are high-level instructions for making this skirt and should be scalable for girls and women sizes. It took me a while to find information on making this skirt so I am hoping that this helps someone else :). At the end of the post, I have links to where you can buy the pattern for girls and another page with a tutorial for another way to make this skirt.
** The numbers below are examples only, all measurements are in inches and no sewing allowance was included in the calculations.
*** Check us out on Instagram @zichie_designs


Step 1- Measurements Needed
Waist (W) = 22
Hip (H) = 24
Skirt Length (L) = 15
# of Panels = 8
Pattern Width (PW) = H/# of panels = 24/8 = 3
* For calculating the pattern width, use the greater of W and H.
Pattern Circumference (PC) = 2*L = 2*15 = 30
* This results in a skirt approximately L long (in my experience). This length can be shortened during the hemming stage.
Pattern Radius (PR) = PC/(2*pi) = 30/(2*3.142) = 4.77 (approx. 4 6/8 inches)

Step 2 - Making the Pattern
Draw a circle with radius = PR. This is your inner circle.
* I used gift tissue paper for the pattern and the circumference of my microwave food cover to determine my length so I could use it to draw my inner circle ...


Draw another circle with the same center as the first one and a radius = PR + PW. This is your outer circle and should be bigger than the first. 
Pick a starting point on the inner circle and about two-thirds of the way around, begin to tapper the outer circle to meet the inner circle.


Cut out your pattern.


Step 3 - Cutting the Fabric
Pin your pattern to your fabric and cut as many pieces as the required number of panels. You can try cutting multiple pieces at one time but I would caution that you don't go above 3 at a time if cutting by hand because the more pieces you have, the bigger the bottom pieces come out.


Step 4 - Putting it all Together
Serging is optional but is a cleaner look and helps with preventing stretching of the curved edges.
Arrange your pieces in the order you want them to go and sew up the curved edges; inner edge to outer edge and right sides together. Align your outer edge piece a quarter inch above the inner edge so that the waistline is smooth in the end.


Step 5 - Finishing
This green and white skirt was my first try and I haven't quite decided how to finish it. I could add an elastic waistband (enclosed or not) or a regular waistband with a zipper.
I think I'll try the zipper; let's see if I can install a curved zipper :).
And of course, don't forget to iron and hem your skirt (I hadn't at the time pictures were taken).


Other Resources
Twirling Skirt Tutorial by Ursula
Pattern for Girls 6m to 10y by Candy Castle